

Keep in the loop
30-10-2019
Having completed my hand caning course, and thoroughly enjoyed it, I started to look for a beginners upholstery course. I wanted to support someone outside of London and found Sarah Louise Dix Upholstery beginners course based in Farnscombe, near Guildford. I chose it for a number of reasons: it was a short, one day-course that started at 10.30 - so not too early a start - and ended at 15.30 so home in plenty of time for dinner, easy to drive to, you came away with an actual item rather than just an upholstered bit of board, not too expensive and if I liked upholstery (and Sarah as a teacher) then she offered a 10 week course to upholster a piece of your own furniture.
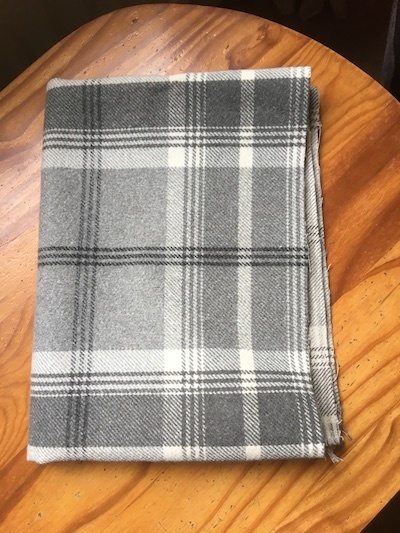
A friend, Jeny (and yes, that's how you spell her name, with one 'n' before you think I've made a mistake!), having seen that I'd done the hand caning course, said if I ever did another course to let her know as she'd be interested in joining me. I called her. She lives in Somerset, so not exactly close by, and I told her about the course. If she came to stay it would give us a great opportunity to get together and have a good catch-up whilst doing something creative rather than just having lunch or meeting for a coffee. We both booked and all we had to do was go source a piece of fabric for our footstools. Off I went to my local interior fabric store and spent ages choosing a remnant of fabric that I thought my son would like. After much deliberation between two fabrics I finally chose a grey and white plaid woollen one.
 My plan was to give him the foot stool once finished. He's probably dreading each course that I do wondering what on earth he'll end up with next! A bit like your children bringing things home from school that they've made - I remember taking home my first clay 'pot' - but now it was in reverse, the parent bringing it home proudly to give to the child! To be fair to me so far he's not had to have anything. I did offer him the two coffee tables before I started upcycling them, he wanted them so was able to chose the colour - a very exciting white! They're stripped down awaiting painting - my next blog. Clive wanted to keep my first hand caning square - in his words '...it's a work of art' - and proudly displayed it in our lounge (cringe), but I have managed to move it off the mantlepiece onto the dresser. As for my first hand caned chair... well, I simply couldn't part with it! I digress...
Jeny arrived on the Friday and on Saturday morning we set off for the course. I'd made a couple of tuna wraps for lunch (wrapped in my beeswax wraps of course!) and we'd taken some other 'supplies' as well. Much to our surprise we had both chosen very similar plaid woollen fabrics except Jeny's was yellow and grey. The courses are held at the back of Sarah's shop amongst various pieces of furniture in the midst of being reupholstered. There were six tables of two people which were set out with various tools (my favourite being the magnetic hammer - magnetised on one end to pick up the tacks and place them, turn it round, flick of the wrist and the tack goes in!) and pots of tacks ready for use. Jeny had spied a coffee shop on our way in and headed off to get us cups of coffee whilst we were waiting for the others to arrive.
Sarah gave us some background information on upholstery and explained we would be learning how to cover our stool using 'traditional' skills. She demonstarted each step first then we went back to our tables to do it on our own stool tops. There were far more steps than I reaslised and I fully appreciate why hand upholstered furntiure is expensive. The first step was to cut a piece of hessian fold the edges over and tack onto the wood base. Next, divide it equally by marking it on two opposite sides (you can
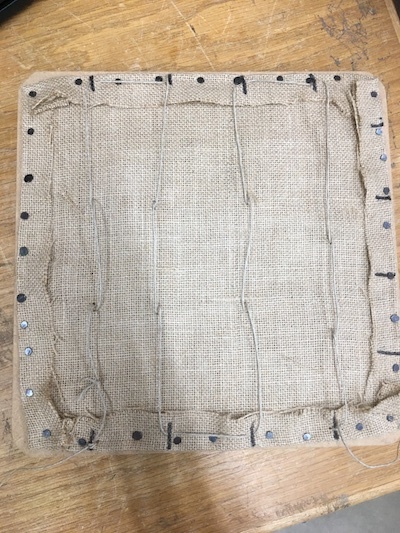 see I got carried away and did three sides!) ready for some 'loose' (you can get your hand under each stitch) back stitiching with the twine. Now for the padding: we took the plastic carrier bag on our table and filled it from the very large roll of coir padding Sarah had. You stuff as much of the padding under the stitiches as posssible and when you think you can't get any more in, keep going! Once finished there is a series of lumps across the stool which need 'pulling' out and you do this by getting your fingers dug in and pulling it apart until it leaves an even feel. The padding is then covered with sheep's wool padding, followed by a fire-proof layer. We used wool rather than a synthetic product. These two layers are not secured with any tacks but simply put over the top. The final layer before the top fabric was a piece of calico.
As you can see the calico square was cut much larger than the stool. We pulled it tight over all the other layers and held it in place with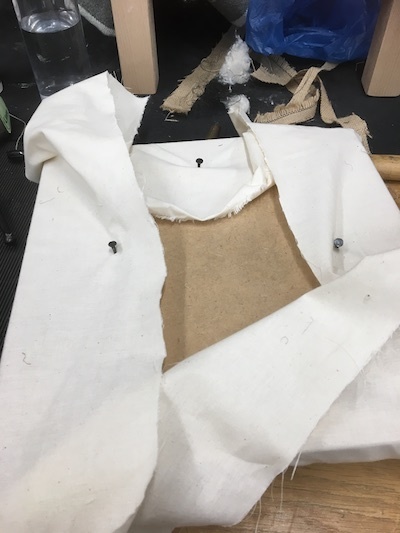
< back to listings
A friend, Jeny (and yes, that's how you spell her name, with one 'n' before you think I've made a mistake!), having seen that I'd done the hand caning course, said if I ever did another course to let her know as she'd be interested in joining me. I called her. She lives in Somerset, so not exactly close by, and I told her about the course. If she came to stay it would give us a great opportunity to get together and have a good catch-up whilst doing something creative rather than just having lunch or meeting for a coffee. We both booked and all we had to do was go source a piece of fabric for our footstools. Off I went to my local interior fabric store and spent ages choosing a remnant of fabric that I thought my son would like. After much deliberation between two fabrics I finally chose a grey and white plaid woollen one.
My plan was to give him the foot stool once finished. He's probably dreading each course that I do wondering what on earth he'll end up with next! A bit like your children bringing things home from school that they've made - I remember taking home my first clay 'pot' - but now it was in reverse, the parent bringing it home proudly to give to the child! To be fair to me so far he's not had to have anything. I did offer him the two coffee tables before I started upcycling them, he wanted them so was able to chose the colour - a very exciting white! They're stripped down awaiting painting - my next blog. Clive wanted to keep my first hand caning square - in his words '...it's a work of art' - and proudly displayed it in our lounge (cringe), but I have managed to move it off the mantlepiece onto the dresser. As for my first hand caned chair... well, I simply couldn't part with it! I digress... Jeny arrived on the Friday and on Saturday morning we set off for the course. I'd made a couple of tuna wraps for lunch (wrapped in my beeswax wraps of course!) and we'd taken some other 'supplies' as well. Much to our surprise we had both chosen very similar plaid woollen fabrics except Jeny's was yellow and grey. The courses are held at the back of Sarah's shop amongst various pieces of furniture in the midst of being reupholstered. There were six tables of two people which were set out with various tools (my favourite being the magnetic hammer - magnetised on one end to pick up the tacks and place them, turn it round, flick of the wrist and the tack goes in!) and pots of tacks ready for use. Jeny had spied a coffee shop on our way in and headed off to get us cups of coffee whilst we were waiting for the others to arrive.
Sarah gave us some background information on upholstery and explained we would be learning how to cover our stool using 'traditional' skills. She demonstarted each step first then we went back to our tables to do it on our own stool tops. There were far more steps than I reaslised and I fully appreciate why hand upholstered furntiure is expensive. The first step was to cut a piece of hessian fold the edges over and tack onto the wood base. Next, divide it equally by marking it on two opposite sides (you can
see I got carried away and did three sides!) ready for some 'loose' (you can get your hand under each stitch) back stitiching with the twine. Now for the padding: we took the plastic carrier bag on our table and filled it from the very large roll of coir padding Sarah had. You stuff as much of the padding under the stitiches as posssible and when you think you can't get any more in, keep going! Once finished there is a series of lumps across the stool which need 'pulling' out and you do this by getting your fingers dug in and pulling it apart until it leaves an even feel. The padding is then covered with sheep's wool padding, followed by a fire-proof layer. We used wool rather than a synthetic product. These two layers are not secured with any tacks but simply put over the top. The final layer before the top fabric was a piece of calico. As you can see the calico square was cut much larger than the stool. We pulled it tight over all the other layers and held it in place with
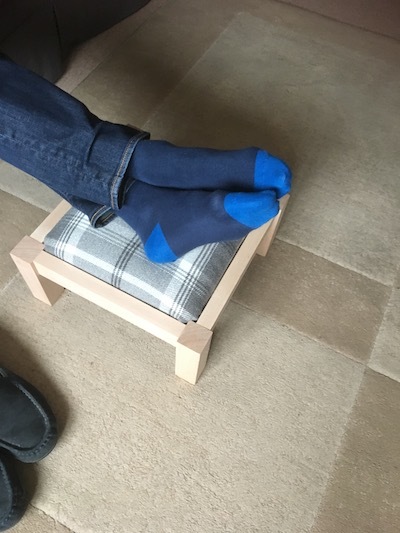
four temporary tacks (I got to use my favourite hammer) placing opposite side tacks in first and then it was a case of going round the edges securing it in place with the permanent tacks, leaving the corners until last and then removing the temporary ones. The corners were then pulled and folded in a particular way - reminded me of how my Mum taught me how to do 'hospital bed' corners with a sheet - and secured with the larger 15mm tacks. The excess on the edges were then trimmed and we were ready for our top fabric. The process for securing it was the same as the calico layer - pull tight, place holding tacks on opposite sides, secure with permanent tacks. Finally came the black backing on the underside and Sarah gave us the option to tack it in place (traditional) or to have a go using the compressed air staple gun. The staple gun can of course be used on the other layers rather than tacks for speed as no one really sees them. She did say that the temptation is to overdo the staples around the edge as it is very satisfying but to aim for two or three each side of the holding tack. Jeny definitely loved using the staple gun and it was firing away all around the edge. The final test was to ensure that the stool top was still able to fit snuggly into the stool frame. Deep breath... yay, they fitted! We were very proud of our achievements and as you can see, even after a day together, we were still talking (we had a lot to catch up on!) when we got home with them.


