

Keep in the loop
Next Upcycling Project - Two little tables.
14-11-2019
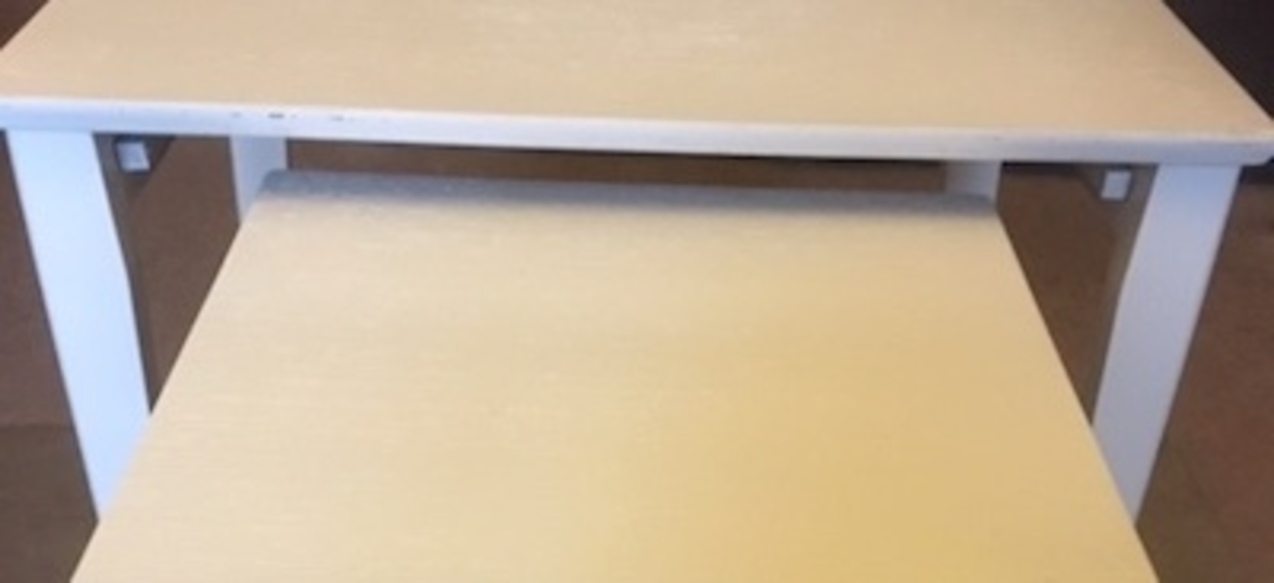
Having rubbed down the chair for my hand caning project I was on the lookout for some more furniture I could start practising my creative and upcycling skills on. I had mentioned it to several friends and one sent me a photo of a chest of drawers asking if I would like them. Unfortunately his grandmother had recently died and her house sold, so they needed to clear it of items. Clive and I went to pick up the chest of drawers only to come back with two sets of drawers (one with a mirror) and a nest of three very wobbly tables. Amazing what you can squeeze in the back of an Astra! His Mum also offered me a lovely old chair that would need stripping and completely recovering - a bit beyond my current upholstery skills but it would be a shame to simply scrap it. I declined because as yet I still didn't have my workshop in the garden to store all these items - that story is for the next blog! However I did say that if no-one else wanted it by the day the house had to be cleared, to let me know and I would go and get it. Needless to say a few days later I went back and retrieved the chair! Our spare bedroom was now somewhat full of old furniture waiting for my workshop to be built so I could get started on upcycling. Well that was the plan!
I decided the small nest of tables would be a good place to start as they would need some work to get rid of their wobble before stripping and painting. I asked my son if he would like them (you can never have too many small side tables) so that if he did want them he could choose the colour. He came home and took a look and said yes he'd have them and would like them painted all white to match in with the rest of his furniture. I'd need help fixing the wobble so approached our friend David Free. He is skilled in working
with wood and runs classes to pass on his skills, so I asked for his help. Off I went to his workshop, which has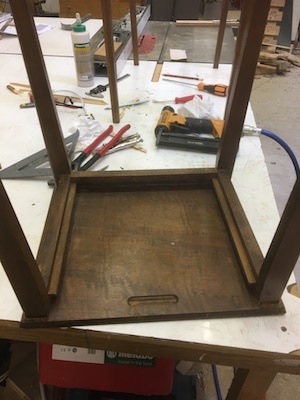 all the woodworking machines and equipment required to build and repair items. I hadn't been able to see any nails or screws that were holding the table together so had no idea of where to start! David knew they were hidden under the 'sliding runners' and skillfully eased the runners out to expose various screws and nails. Only one broke in the process but was easily replaced when you have bits of wood lying around. Each table was completely taken apart. Unfortunately the middle-sized table was beyond repair for various reasons and we decided to scrap it and concentrate on the other two. Having taken them apart it was then a case of getting the legs square and glueing the joints
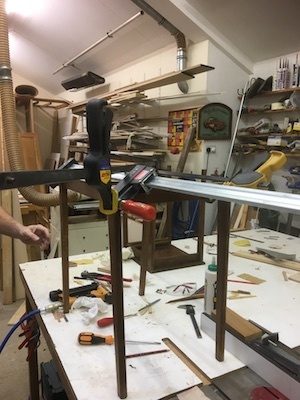 as well as nailing them back into place. As you can see they hardly resembled a table at this point with various bits of equipment holding the legs square and in place until the glue had set. Whilst we were waiting David set about making a 'runner' to replace the one that had split and could no longer be used. I now understand why nothing gets thrown away in a workshop as the smallest piece of wood could be useful one day on another project. David found some suitable wood, measured it, switched on various machines and fed the piece through so it was exactly the size and thickness we needed to fit into the space. Finally the top of the table was screwed and glued back into place and the 'runners' glued and replaced hiding the screws. I returned home with the two tables ready to be rubbed down ready for painting. David had also suggested that when the tables were prepared that I go back to his workshop and he would show me another option of painting the tables by spraying them as opposed to using a brush. It would be good to see how spray painting is done and appreciate the difference to brush painting. However in reality I think most of my work will be hand painted, as I don't have the room to set up a spray booth, or the equipment to ensure the air is clean and dust free.
< back to listings
I decided the small nest of tables would be a good place to start as they would need some work to get rid of their wobble before stripping and painting. I asked my son if he would like them (you can never have too many small side tables) so that if he did want them he could choose the colour. He came home and took a look and said yes he'd have them and would like them painted all white to match in with the rest of his furniture. I'd need help fixing the wobble so approached our friend David Free. He is skilled in working
with wood and runs classes to pass on his skills, so I asked for his help. Off I went to his workshop, which has
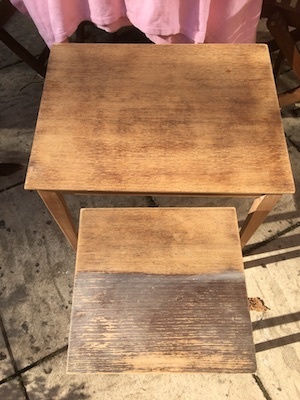
all the woodworking machines and equipment required to build and repair items. I hadn't been able to see any nails or screws that were holding the table together so had no idea of where to start! David knew they were hidden under the 'sliding runners' and skillfully eased the runners out to expose various screws and nails. Only one broke in the process but was easily replaced when you have bits of wood lying around. Each table was completely taken apart. Unfortunately the middle-sized table was beyond repair for various reasons and we decided to scrap it and concentrate on the other two. Having taken them apart it was then a case of getting the legs square and glueing the joints as well as nailing them back into place. As you can see they hardly resembled a table at this point with various bits of equipment holding the legs square and in place until the glue had set. Whilst we were waiting David set about making a 'runner' to replace the one that had split and could no longer be used. I now understand why nothing gets thrown away in a workshop as the smallest piece of wood could be useful one day on another project. David found some suitable wood, measured it, switched on various machines and fed the piece through so it was exactly the size and thickness we needed to fit into the space. Finally the top of the table was screwed and glued back into place and the 'runners' glued and replaced hiding the screws. I returned home with the two tables ready to be rubbed down ready for painting. David had also suggested that when the tables were prepared that I go back to his workshop and he would show me another option of painting the tables by spraying them as opposed to using a brush. It would be good to see how spray painting is done and appreciate the difference to brush painting. However in reality I think most of my work will be hand painted, as I don't have the room to set up a spray booth, or the equipment to ensure the air is clean and dust free. I waited for a sunny day and took the tables outside to start rubbing them down. I was careful to only take the varnish off rather than rub all the veneer off as well. I used a block and fine sandpaper to rub it all back then wiped it off with a damp cloth to ensure all the dust was removed. It was rewarding to see all the scratches and marks slowly disappear as I rubbed them down and the colour underneath start to shine through. The tables looked very different when I'd finished and were now ready for painting.
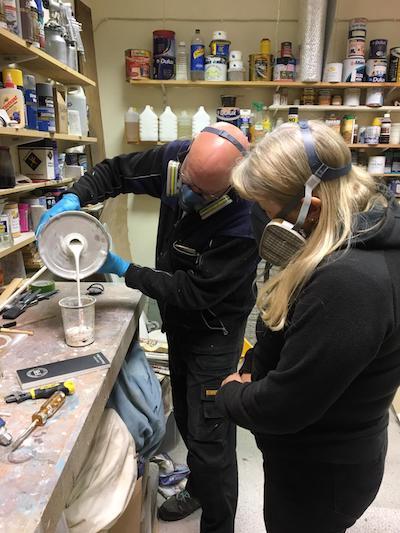 I went back to David's with the tables and into his paint shop. The paint shop has various air filters which are switched on when spraying to ensure no dust particles settle onto the new paint. We also wore masks as the paint had to be mixed with various chemicals before pouring it into the spray gun. The tables were wiped down using a 'Tak' (or 'Tack)' cloth to remove any tiny bits, and the volume of paint coming out of the gun was checked before the paint was sprayed onto the table. When spraying you start slightly before and finish slightly after the object you are spraying and keep the gun at the same angle as you move across - the temptation is to move your wrist rather than your arm whilst you are spraying. Once the first coat was applied we went for a cuppa and let it dry. It takes longer on a cold day to dry than a warm one but even then it dried within 30 minutes and was ready for the second coat. Before applying the second coat we checked the table for any tiny lumps, dust or runs that would become more exaggerated with the second coat. The top coat was then mixed and applied in the same way and left to dry. The two tables looked very different to when I had collected them! I was really pleased that I had been able to rescue the tables from going to landfill and to give them a new lease of life. They are now proudly being used in their new home. Now where are those two chests of drawers?...
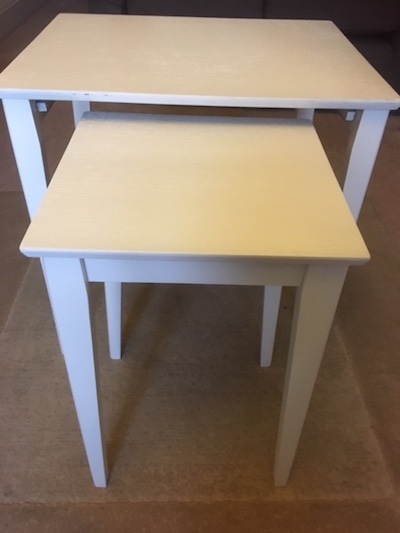
I went back to David's with the tables and into his paint shop. The paint shop has various air filters which are switched on when spraying to ensure no dust particles settle onto the new paint. We also wore masks as the paint had to be mixed with various chemicals before pouring it into the spray gun. The tables were wiped down using a 'Tak' (or 'Tack)' cloth to remove any tiny bits, and the volume of paint coming out of the gun was checked before the paint was sprayed onto the table. When spraying you start slightly before and finish slightly after the object you are spraying and keep the gun at the same angle as you move across - the temptation is to move your wrist rather than your arm whilst you are spraying. Once the first coat was applied we went for a cuppa and let it dry. It takes longer on a cold day to dry than a warm one but even then it dried within 30 minutes and was ready for the second coat. Before applying the second coat we checked the table for any tiny lumps, dust or runs that would become more exaggerated with the second coat. The top coat was then mixed and applied in the same way and left to dry. The two tables looked very different to when I had collected them! I was really pleased that I had been able to rescue the tables from going to landfill and to give them a new lease of life. They are now proudly being used in their new home. Now where are those two chests of drawers?... 

